Guides > Web interface > 3D Tool
Updated on 12 Mar 2023
Scale
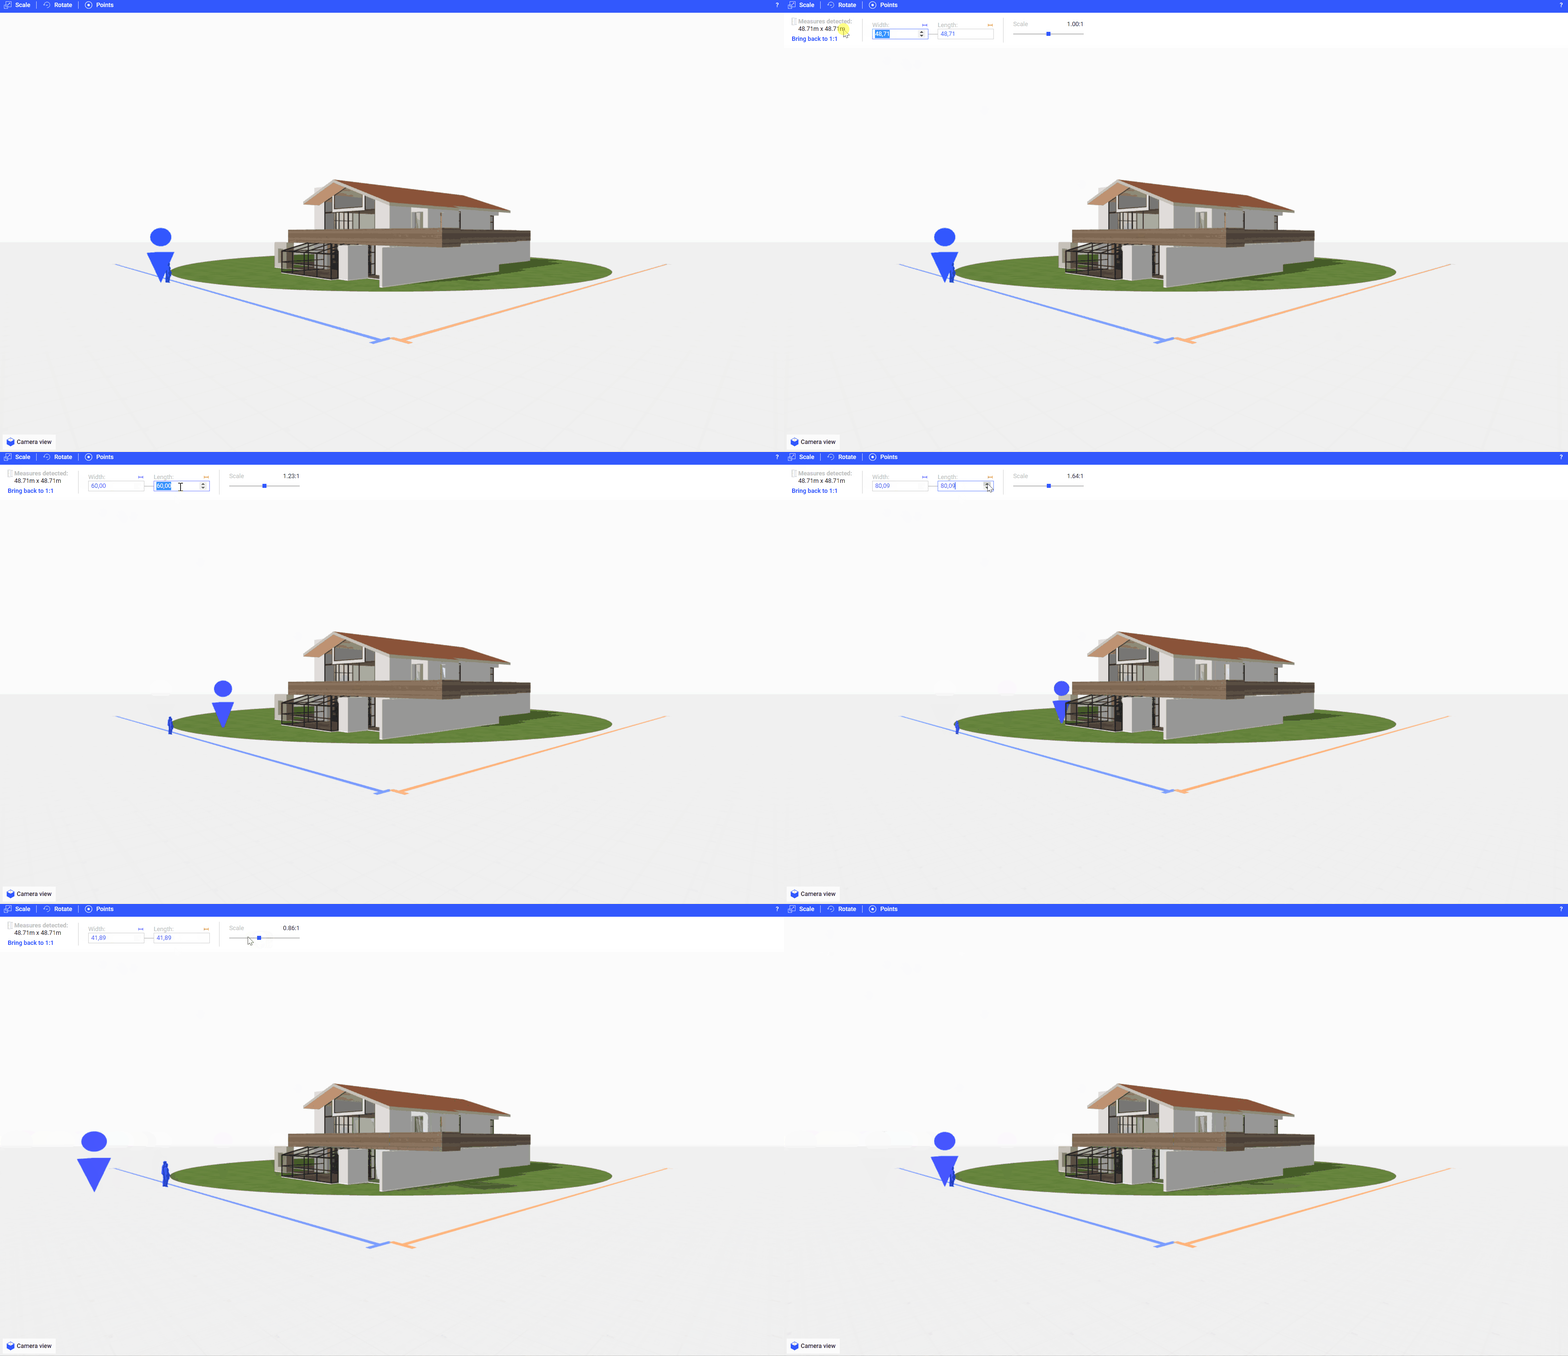
When creating a model, it is important to verify that the model's scale is 1:1, if desired. Unfortunately, during export, every software handles scale differently, so measurements may not appear correct. For this reason, you can use the scale tool to correct any errors.
When the model is imported, we will provide you with measurement information in meters that we have identified at the top left of the 3D viewer. In case the measurements are not correct, you have two ways to interact with the scale: numeric or through the slider. Remember that width and depth are proportionally connected, so changing one parameter will also change the other.
In the case of a free scale (via the slider), you will find two models of people in the scene that can help give an idea of proportions relative to the scene:
- 1 high 1.80 m in height
- 1 high 1.60 m in height
In case of problems, it is always possible to return to a 1:1 scale by pressing the command "Reset to 1:1 scale".

Rotate
During the creation of a model, it is important to verify that the rotation is correct relative to the scene. Unfortunately, every software handles rotation differently during export, so rotation errors may occur. For this reason, you can use the rotation tool to correct any errors.
You can rotate the model on all three axes x, y, and z by entering the number of degrees in the text input field corresponding to the respective axis, or by using the shortcut keys to rotate -90° and +90°.
In case of problems, it is always possible to return to the original rotation by pressing the command "Reset".

Points (Entry and Points of Interest)
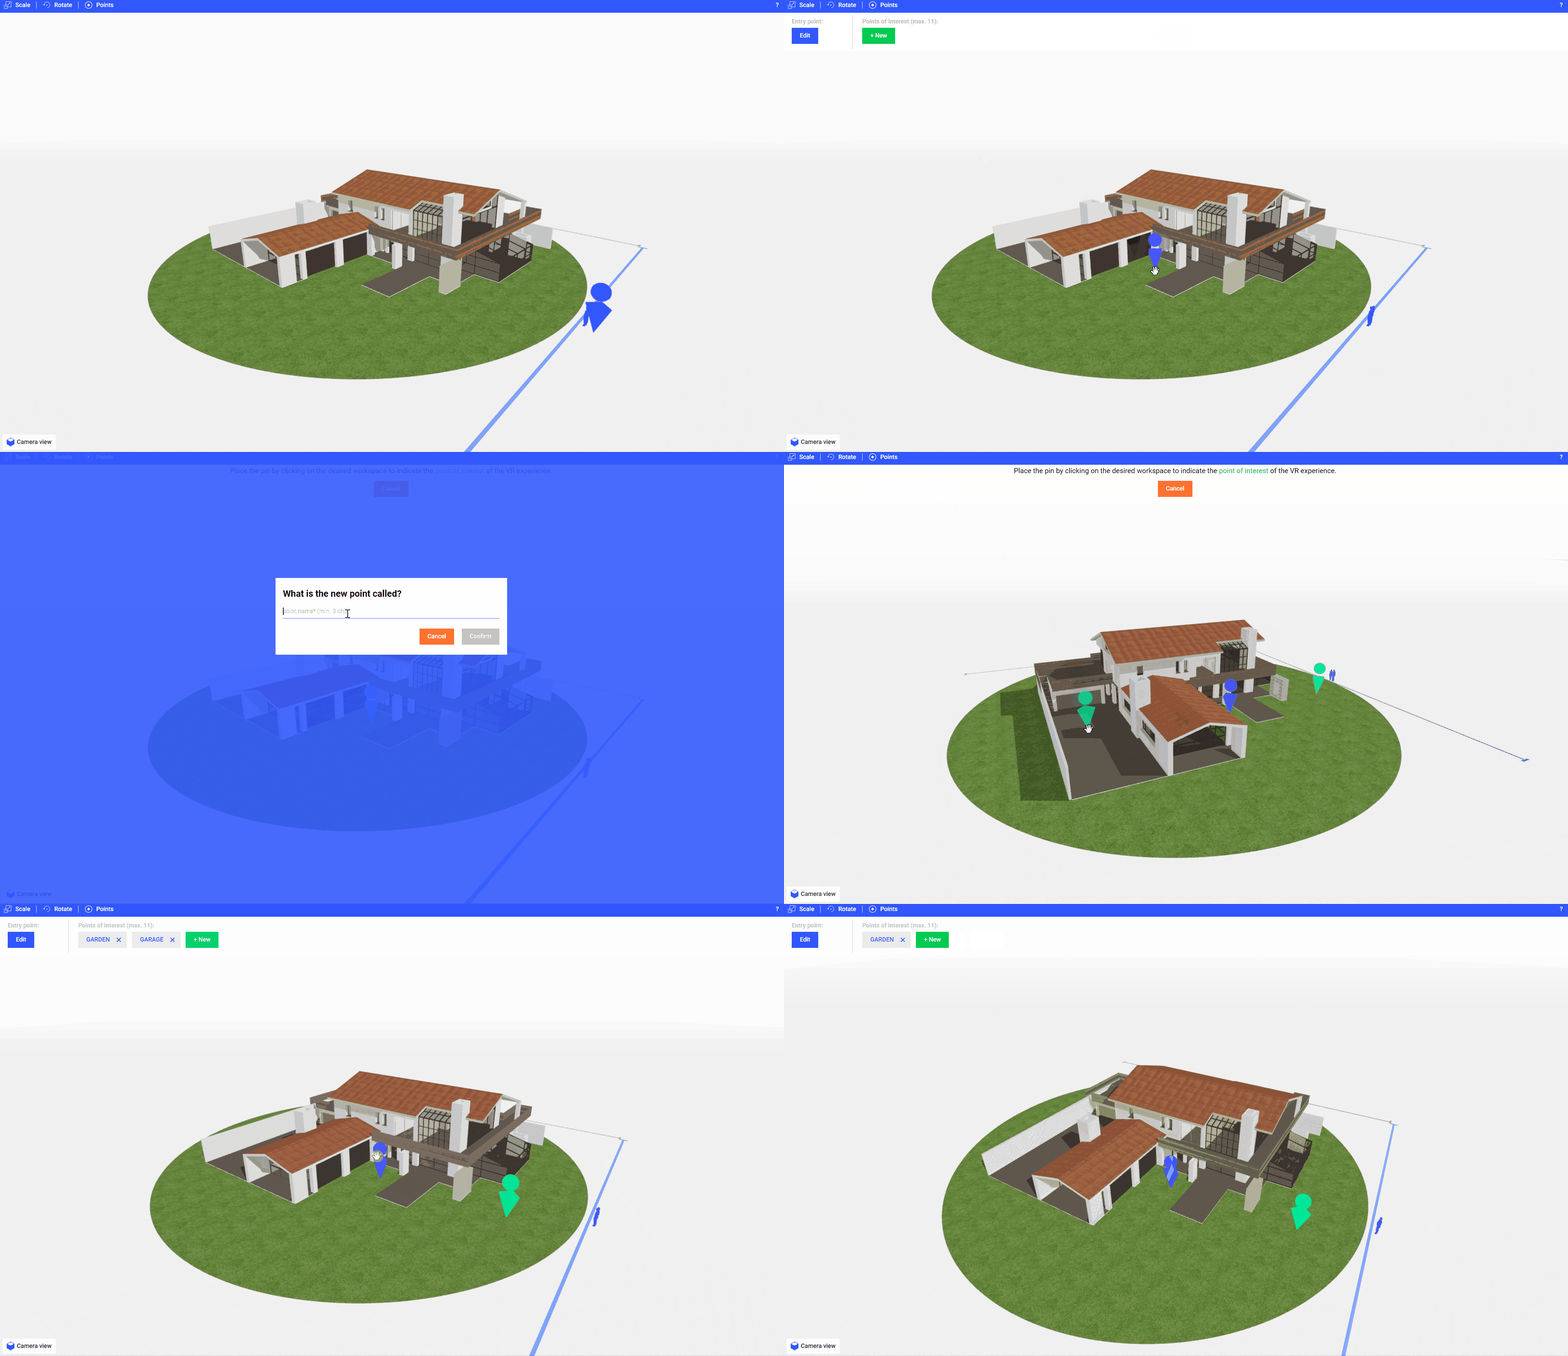
When a 3D model is loaded, a random entry point for the VR experience is automatically set. This entry point represents the starting point of the experience when you want to view the model in virtual reality.
With the "Points" tool, you can set:
1. The entry point of the experience.
To position the entry point, simply click on the blue "Edit" button, position the pin by clicking on the desired workspace area to indicate the initial entry point of the VR experience.
2. Secondary points of interest to the entry point.
For points of interest, in the same way, by pressing the "New" button, you can position the pin on the workspace area and a popup will appear where you can assign a name. You can create up to 11 points of interest that will help you navigate more quickly in the VR experience to reach a place faster. Once created, you can click on the created tag to rename it or delete it.

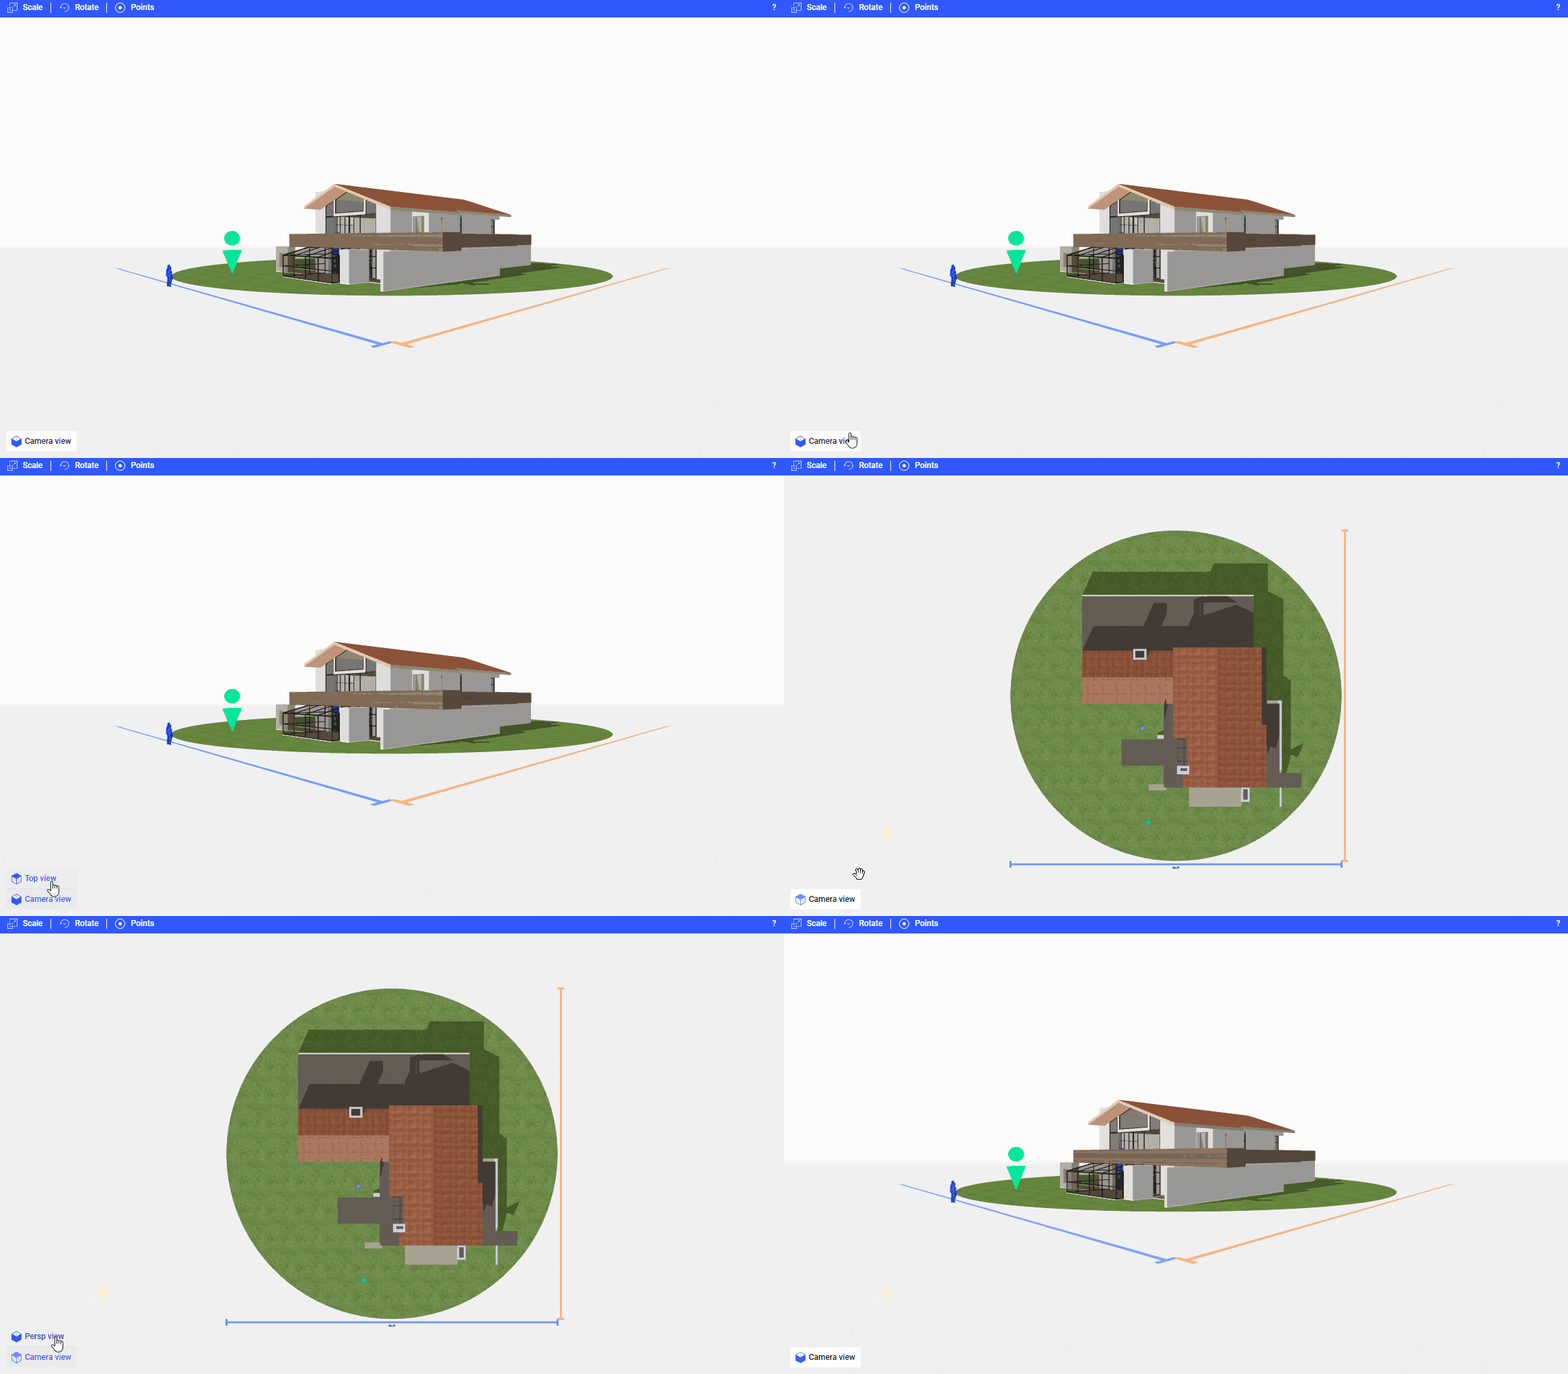
Within the viewer, it's possible to set different types of camera to view the 3D model:
Perspective camera: to navigate through the model with a realistic perspective.
Top view: to set an isometric view with a top-down perspective.

Assistance center
info@solidoplus.com
+39 0372 808043
From Monday to Friday
9:00 - 12:00 | 15:00 - 17:00
@2023 Solido+ | Contact us | Privacy Policy | Cookie Policy | Terms and Conditions
A product of PowerMOB srl | P.IVA 01654140191 | REA CR - 190890 | CS €12.000,00 iv